Renting out a rental unit for the first time can be an exciting and profitable venture. However, it can also be an overwhelming experience, especially if you don’t know where to start. From advertising the rental unit to collecting rent and maintaining the property, there are many steps involved in the process. In this article, we will delve deeper into each step to give you a comprehensive guide on how to rent out a rental unit for the first time.
Step 1: Set Your Rental Price
The first step in renting out a rental unit is to set your rental price. You need to research the rental prices in your area to determine the appropriate rent you should charge for your unit. You can start by checking online rental listings to see what other landlords are charging for similar rental units in your area. You can also ask for advice from a local real estate agent or property manager.
Factors that can affect the rental price include the size of the unit, location, amenities, and condition of the property. It is essential to set a competitive rental price to attract potential tenants, but you should also ensure that the rent is enough to cover your expenses, including mortgage payments, property taxes, and maintenance costs.
Step 2: Advertise Your Rental Unit
Once you have determined the rental price, the next step is to advertise your rental unit. You need to reach out to potential tenants through various channels, such as online rental listings, social media, flyers, and word of mouth.
Online rental listings: There are many online platforms where you can list your rental unit for free, such as Zillow, Trulia, Craigslist, and Apartments.com. These platforms allow you to create a listing that includes photos, a description of the property, rental price, and contact information.
Social media: Social media platforms such as Facebook, Twitter, and Instagram can be a powerful tool for advertising your rental unit. You can create a post that includes photos of the property, rental price, and contact information, and ask your friends and family to share the post to reach a wider audience.
Flyers: You can create flyers that include photos of the property, rental price, and contact information, and post them in local community centers, grocery stores, and other public places.
Word of mouth: You can also tell your friends, family, and colleagues that you have a rental unit available for rent. They may know someone who is looking for a place to rent and can refer them to you.
Step 3: Screen Potential Tenants
Once you start receiving inquiries from potential tenants, the next step is to screen them to ensure that you are selecting reliable tenants. A thorough screening process can help you avoid tenants who may cause problems in the future, such as not paying rent or damaging the property.
The screening process may include the following:
- Credit reports: You can request a credit report from the potential tenant to check their credit history, including their payment history and outstanding debts.
- Criminal background checks: You can also conduct a criminal background check to ensure that the potential tenant does not have a criminal history that may pose a risk to other tenants or the property.
- References: You can ask for references from the potential tenant’s previous landlords, employers, or personal references to verify their reliability and trustworthiness.
- Income verification: You can ask for proof of income, such as pay stubs or tax returns, to ensure that the potential tenant can afford the rent.
- Credit reports: You can request a credit report from the potential tenant to check their credit history, including their payment history and outstanding debts.
Step 4: Prepare the Rental Agreement
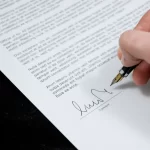
Once you have found a suitable tenant, the next step is to prepare a rental agreement that outlines the terms and conditions of the lease. The rental agreement should include the following:
- Rent payment: The rental agreement should specify the rent amount, payment due date, and payment method.
- Move-in and move-out dates: The rental agreement should specify the move-in and move-out dates, including the time when the tenant can move in and the date by which they should vacate the rental unit.
- Security deposit: The rental agreement should specify the security deposit amount and how it will be used.
- Maintenance responsibilities: The rental agreement should specify the maintenance responsibilities of both the landlord and tenant, including who is responsible for repairs and maintenance of the property.
- Pets: If you allow pets in your rental unit, the rental agreement should specify the pet policy, including the type of pets allowed, the number of pets, and any additional fees or deposits.
- Utilities: The rental agreement should specify which utilities are included in the rent and which are the responsibility of the tenant.
- It is essential to have a written rental agreement to avoid any misunderstandings between you and the tenant. You can either use a standard rental agreement template or consult with a lawyer to ensure that the rental agreement complies with local laws and regulations.
Step 5: Conduct a Move-In Inspection
Before the tenant moves in, it is crucial to conduct a move-in inspection to document the condition of the rental unit. The move-in inspection should include a thorough inspection of the property, including the walls, floors, appliances, and fixtures. You should take photos or videos of any pre-existing damage and document them in writing. Both you and the tenant should sign the inspection report to acknowledge that you agree on the condition of the rental unit.
A move-in inspection can help you avoid any disputes over damages that occur during the tenant’s stay. If the tenant causes any damages to the rental unit during their tenancy, you can refer to the move-in inspection report to determine whether the damage was pre-existing or caused by the tenant.
Step 6: Collect the Security Deposit
Collecting a security deposit is a standard practice in renting out a rental unit. A security deposit is a sum of money that the tenant pays to the landlord to cover any damages to the rental unit beyond normal wear and tear. The security deposit is usually equal to one or two months’ rent, but this can vary depending on local laws and regulations.
It is essential to collect the security deposit before the tenant moves in and ensure that it is held in a separate account from your personal finances. You should also provide the tenant with a receipt that indicates the amount of the security deposit and the account where it is being held.
Step 7: Collect the First Month’s Rent
Before the tenant moves in, you should also collect the first month’s rent. The first month’s rent is due on the move-in date, and it is essential to collect it in advance to ensure that the tenant is committed to the rental agreement. You can collect the rent through a check, money order, or online payment.
Step 8: Provide Keys and Instructions
On the move-in date, you should provide the tenant with a set of keys and instructions on how to operate appliances and other equipment in the rental unit. You should also provide the tenant with a contact number or email address where they can reach you in case of emergencies or repairs.
Step 9: Perform Regular Maintenance
As a landlord, it is your responsibility to maintain the rental unit regularly and address any repair or maintenance issues promptly. Regular maintenance can help prevent costly repairs and ensure that the rental unit is in good condition for the tenant.
You should perform routine maintenance tasks such as cleaning the gutters, changing air filters, and inspecting the plumbing and electrical systems regularly. You should also address any repair issues promptly to avoid causing inconvenience to the tenant.
Step 10: Conduct a Move-Out Inspection
When the tenant moves out, you should conduct a move-out inspection to document the condition of the rental unit. The move-out inspection should be similar to the move-in inspection, and you should take photos or videos of any damages or necessary repairs. You can compare the move-out inspection report with the move-in inspection report to determine if any damage was caused during the tenant’s stay.
Step 11: Return the Security Deposit
After the tenant moves out, you should return their security deposit, minus any deductions for damages or unpaid rent. You should provide the tenant with an itemized list of any deductions and the amount being returned.
Step 12: Prepare the Rental Unit for the Next Tenant
After the tenant moves out, you should prepare the rental unit for the next tenant. This includes cleaning the unit, repairing any damages, and performing routine maintenance tasks.
You should also update any advertising or rental listings for the property and start the process of finding a new tenant.
Conclusion
Renting out a rental unit for the first time can be a daunting task, but by following these steps, you can make the process more manageable. It is essential to prepare the rental unit, screen potential tenants, create a rental agreement, conduct move-in and move-out inspections, and perform regular maintenance.
Remember that renting out a rental unit requires ongoing communication with your tenant and attention to detail. By being a responsible and responsive landlord, you can create a positive and profitable rental experience for both you and your tenant.


